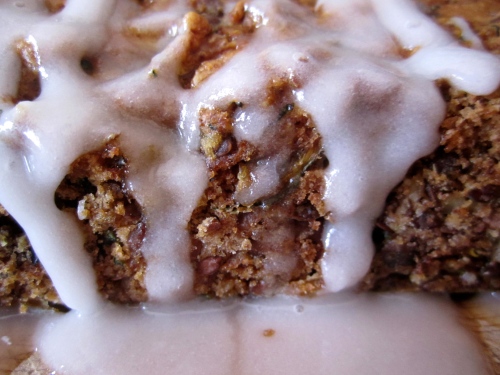
Easiest Chocolate Cake Ever with Speculoos Frosting

Do you feel absolutely compelled to make a baked good for every special occasion? Every birthday and baby shower and going away party? Does the feeling nag at you while you’re supposed to be working or studying, or paying attention to traffic? But where to find the time to shop for groceries, and let various crusts chill and custards set and chocolate melt? I suffer from this.

Every home baker/foodie/chef/food enthusiast needs an easy chocolate cake recipe, because you never know when you are going to check Facebook and see that you have three friends with birthdays next week.  While I’m a fan of cake mixes, those ubiquitous red cardboard boxes are a rare sighting here in Morocco, found only on the shelves of pricey foreign supermarkets, right between the soy sauce and almond milk. And besides, using a mix can sometimes feel like a failure, admit it. You want to present the birthday boy/girl, graduate, mom-to-be with a tray of cookies, or a lovely cake and say, I made it. From scratch.

IMG_0502

This is the easiest chocolate cake ever, and I can assure you that you will have all the ingredients in your pantry. The glaze calls for speculoos spread, but you could easily sub in peanut butter or another nut butter for equally spectacular results. This cake is moist and chocolatey without being dense, and strangely addictive- it’s easy to eat two pieces (or three or four).

The glaze is rich, sweet, and spicy so use the whole batch if you want to go really decadent (as I did) or just drizzle on half if you want to exercise some restraint.

So breathe deeply and take on that string of social occasions confidently.

Cake

Adapted from southernfood.com

Ingredients:

  • 1 1/2 cups AP flour
  • 1 cup sugar
  • 3 tablespoons unsweetened cocoa powder
  • 1 teaspoon baking soda
  • 1/2 teaspoon salt
  • 1 teaspoon vanilla extract
  • 1 teaspoon white vinegar
  • 5 tablespoons vegetable oil
  • 1 cup cold water
  • 1 tablespoon espresso powder or instant coffee powder (optional)
  1. Preheat oven to 350 degrees F. Mix flour, sugar, cocoa powder, baking soda, and salt in a large bowl.
  2. Make 3 wells in the dry ingredients. Pour vanilla into one well, vinegar into another, and oil into the last.
  3. Pour cold water over everything and mix until there are no more dry streaks. Stir in espresso powder if using.
  4. Pour into an 8X8 square cake pan. Bake for 35-40 minutes, until center is set and tester comes out with just one or two crumbs (baking time may vary).
  5. Allow to cool on a rack.

Speculoos Glaze

courtesy of The First Mess

Ingredients:

  • 1 cup powdered sugar
  • 1/4 cup speculoos spread (or “cookie butter if your shopping at Trader Joe’s)
  • 2 teaspoons maple syrup*
  • splash of vanilla extract
  • 3-5 tablespoons milk (milk substitute will be fine)
  1. Mix sugar and speculoos spread until a thick paste forms.
  2. Mix in maple syrup and vanilla.
  3. Whisk in 3 tablespoons milk with a fork. If too thick, add another tablespoon. Glaze should be thick but pourable.
  4. If you want a thick layer of sweet glaze, pour onto the cooled cake and spread quickly with a spatula. Or drizzle half of the glaze onto the cake. And eat the rest with a spoon.

* I didn’t have maple syrup, but used maple extract with great success. I had to add more milk to make up for less moisture though.

IMG_0489


Jus de Fraise (Strawberry Juice)

IMG_0310

It’s strawberry season here in Morocco. Strawberries are sold by the kilo off of wooden carts piled high with the fruit, crowded into the narrow streets of the souk already bursting with produce. Vendors with hands stained red call out the price, usually equaling to about 1 dollar for a kilo. By nightfall, the mountains of strawberries dwindle to hills, prices dip, and a few stragglers (often including myself) do some late-night shopping for dessert, usually a salad with finely diced bananas, oranges, apples, and strawberries, dressed in orange juice. Locals do not dip strawberries in chocolate, and they do not eat them with biscuits and cream. These strawberries need no embellishment.

The first time I tried strawberry juice was here in Morocco, and it was a revelation. I probably drank it standing up at the counter of a mahalaba, a  shop that sells juice, sandwiches, and yogurt. Or it could have been at a local cafe in the warmer months of summer, along with a chicken briwat (a chicken filled pastry). In any case, I was instantly smitten. Strawberries have never been my favorite fruit, but blended with orange juice and drunk in a cold glass, it’s the best smoothie you’ve ever had.

IMG_0483

serves 4-6

Ingredients:

  • 2 pounds strawberries, hulled and halved
  • 1 cup orange juice
  • 4 tablespoons sugar
  1. Place all ingredients in a blender and blend until smooth. Enjoy!


Tunisian Meatballs with Buttered Couscous from David Tanis’s “One Good Dish”

When I first moved to Morocco, I imagined I might travel to other parts of North Africa, or the Maghreb in French, referring to Morocco, Algeria, Tunisia, and Libya. Turns out it’s not quite so easy to traverse the borders, the political relationship between Morocco and it’s neighbor Algeria being tenuous. I rarely meet Algerians here, and have yet to meet a Tunisian or Libyan. As a result, those countries now hold a sort of mystique for me. So when I saw this recipe for Tunisian meatballs on seriouseats.com from New York Times food writer David Tanis, I jumped at the opportunity. I may not be able to skip over to Tunisia for a sunny weekend on the beach, but I can pretend I’m there while enjoying these hearty, spiced meatballs with buttery couscous on my terrace.

These meatballs are somewhat of a project but so worth the extra time and effort. Don’t be intimidated by the long list of ingredients; most of them are spices and will take just a couple seconds to measure out and add. I used ground beef because the butcher was out of lamb, but I imagine lamb would be even more authentic. Savory spiced meatballs in a light tomato sauce top steaming bowls of couscous and sweet golden raisins. They keep well and make a large batch, so you can enjoy them throughout the week. And once you finish the couscous, use them to top a toasted baguette to make an exotic meatball sub. It’s comfort food without the predictability.

Get the recipe here.

IMG_0269

Warm Eggplant Tahini Sauce (Baba Ghanoush)

IMG_0386I used to be intimidated by eggplants because I wasn’t sure what to do with them. Oddly shaped, disconcertingly shiny, and so purple, eggplants seem to have an other-worldly quality to them. But then I discovered Mark Bittman’s brilliant technique of cooking a whole eggplant on a hot pan, no prep or extra ingredients required. Smooth and smoky, ready to eat sliced open with a sprinkle of salt. Or, pureed into baba ghanoush, the creamy Middle Eastern dip with tahini and lemon.

My love affair with Middle Eastern food began a few years ago when I moved to Boston for school and discovered the joys of hummus, falafel,  ful medames (a fava bean dip), mezze, and the mix of savory and sweet often found in Arabic cuisine. Growing up in the suburbs of Southern California, my paradigm of international cuisine was shaped by sushi and tacos. In Boston I discovered Lebanese and Syrian food, not to mention Indian, Nepalese, and Ethiopian (still dreaming about the tangy injera at Fasika in East Somerville). I discovered Middle Eastern food at the same time I began to learn to cook, so ingredients like cumin, tahini, and za’atar became staples in my kitchen. And I prefer eating mezze style. I would rather pick and choose from an array of salads, creamy dips, grilled vegetables, and a few small meat dishes than take on one large, monotonous sandwich or pizza.

Baba ghanoush is one of my favorite additions to my lunchtime mezze spread, because it counts as a vegetable even though it tastes and feels decadent. Plus, it’s simple and can be prepared in advance. I’ve blended plain yogurt with my version to add tang and creaminess. Serve it with cherry tomatoes, slices of cucumber, fresh bread, or my favorite- smeared onto hard-boiled eggs sprinkled with flaky salt and cumin. It doesn’t hurt to use farm-fresh eggs, like I used here (beware- all other eggs will look sad and anemic once you’ve spoiled yourself with the real deal).

IMG_0389

IMG_0390

makes about 1 cup.

Ingredients:

  • 1 eggplant
  • 1 small container plain yogurt (1/2 cup)
  • 1 clove of garlic, grated or finally minced
  • 2 tablespoons tahini
  • juice of 1 lemon
  • 1/2 teaspoon salt
  • 1/2 teaspoon cumin
  • a few walnuts (optional)
  • sesame seeds for garnish (optional)
  1. Place eggplant in a dry pan over high heat. Cook over high heat, turning once, until flesh begins to char and break down on both sides (10 to 30 minutes, depending on eggplant).
  2. Scoop out flesh from cooked eggplant and discard skin. Place warm eggplant and all other ingredients into food processor and blend until smooth, about 30 seconds. I like this served warm, sprinkled with sesame seeds, but can be refrigerated for 3-5 days.

Whole Wheat Zucchini Spice Cake with Lemon Glaze

IMG_0362

It may not yet be summer, but the souk is overflowing with zucchini right now, so I felt compelled to take advantage of the bounty and purchase a couple pounds this past weekend. Now faced with the age-old dilemma of zucchini overload in my crisper drawer, I find myself slicing them into omelettes, shaving them into salads, and now, grating them into cake. Zucchini cake is an ingenious strategy to consume your veggies and dessert simultaneously, so you can feel both virtuous and indulgent, which incidentally, is my preferred state of eating.

I wanted this particular loaf cake to be a bit more interesting than a simple vehicle for the ubiquitous squash, however. It shouldn’t just be cake with bits of green- it should have spice, texture, and depth of flavor. So I added whole wheat flour, ground flaxseed and walnuts, and ginger, cinnamon, and coriander, and finished it with a crunchy lemon glaze. It was delicious on day one, even better on days two and three, when the flavors had time to meld. Lemony, slightly spicy, not-too-sweet, and a little hearty, this cake is ideal for afternoon tea or coffee, when you might crave donuts but feel like you should be eating carrot sticks.

IMG_0356

IMG_0369

Makes one 9×5 loaf.

Ingredients:

For the cake:

  • 1 medium zucchini, grated
  • 1/3 cup sugar
  • 1/3 cup light brown sugar, lightly packed
  • 1/2 cup oil
  • 1 egg, beaten
  • zest of 1 small lemon
  • 1 teaspoon vanilla extract
  • 3/4 teaspoon salt
  • 1 teaspoon baking soda
  • 1 cup AP flour
  • 1/2 cup whole wheat flour
  • 1 teaspoon ground ginger
  • 1/2 teaspoon cinnamon
  • 1/2 teaspoon coriander
  • 1/2 cup finely chopped walnuts
  • 1/4 cup ground flaxseed

For the glaze:

  • 1 cup powdered sugar
  • juice of one medium lemon
  1. Preheat oven to 350 degrees f. Grease a 9×5 loaf pan and dust lightly with flour.
  2. Whisk together egg, sugars, vanilla, oil, and lemon zest in large bowl. Stir in grated zucchini.
  3. Whisk flours, spices, and salt in a separate bowl.
  4. Sprinkle baking soda over wet mixture and stir to combine.
  5. Add dry ingredients to wet mixture gradually, whisking as you go. Mix until just combined.
  6. Stir in walnuts and flaxseed. Batter will be very thick.
  7. Spoon into loaf pan, smooth the top with a spatula or large spoon, and bake in preheated oven for 50-55 minutes, or until tester inserted in the middle comes out clean. Let cool for 10 minutes on wire rack and invert.
  8. Since this cake is better on day two, I would wait until the second day to glaze, but if you can’t wait, at least wait until the cake is completely cool. Stir together the powdered sugar and lemon juice with a fork and drizzle over the cake in horizontal lines. The glaze should be pretty thick and just barely pourable.

Curried Chicken Salad with Toasted Almonds and Golden Raisins

I often roast a chicken on Sunday or Monday night to serve to friends or to pick at for the rest of the week. Roasting a whole chicken seemed initially intimidating to me- for no other reason than the fact that I was placing an entire animal in the oven, which, for a convert from semi-vegetarianism seemed a task akin to hunting and butchering my own elk. It turns out, however, that roasting chicken is actually quite simple (thank you jamie oliver)  and it gives me the cozy feeling of being a homemaker, which in reality, I am not.

This week I decided to exercise self-restraint. Instead of devouring the chicken within minutes of emerging from the oven, golden and crispy-skinned and juicy, I waited until it cooled, shredded it to pieces, and decided to make chicken salad for the week. I wanted a salad with all the usual elements- crunch, tartness, sweetness, a little bite. And I wanted to utilize the mountains of fresh spices so readily available here in Tangier.

IMG_0307

Curry, crunchy toasted almonds, chunks of pineapple, plump golden raisins- she’s the exotic cousin to the Waldorf. I used a flaky croissant from one of the many local bakerie to make a sandwich, but I’m sure this salad would be equally delicious heaped onto wheat crackers, toasted brioche, or even slices of green apple. I like to think that this chicken salad forges cultural connections yet unseen in the culinary world (American tradition, Indian spices, Moroccan flair). Or it just provides me with lunch for the week. In any case, I’m excited about it.

IMG_0337

Ingredients:

  • 1 roasted chicken, shredded
  • 1 cup almonds
  • 1/2 cup golden raisins
  • 2 green onions finely chopped
  • 300 grams chopped canned pineapple
  • 2 tablespoons of curry powder (I made my own from this recipe)
  • 1/2 cup mayo
  • 1/2 cup plain yogurt
  • 1/2 a lemon
  1. Preheat the oven to 225 degrees F. Place the almonds on a tray and bake in preheated oven for 10-12 minutes, stirring frequently. I like my almonds very toasty, but be careful not to let them burn! Remove from the oven when they are dark brown and you can smell them.
  2. Meanwhile, soak the golden raisins in the juice from the pineapple. Drain.
  3. When almonds are cool, chop coarsely. Mix curry powder with yogurt and mayonnaise.
  4. Combine all ingredients in a medium bowl with curry-yogurt-mayo mixture. Mix well to make sure salad is uniform. Squeeze lemon into salad, and season with salt and pepper to taste. Salad will keep in refrigerator for four days. Makes enough for about 8 sandwiches.

Lemon Curd

IMG_0285

Lemons are normally a staple in my kitchen. I use lemon juice to make salad dressing and add zing to soup, and lemon zest to cut sweetness in cakes, glazes, even cookies. In the past, I purchased a tidy bag of lemons at Trader Joe’s every week, but here in Morocco, this ubiquitous citrus fruit is not always so abundant. At the peak of summer for example, the marketplace is bursting with figs and peaches, but lemons are harder to come by, given that fruits and vegetables are actually available according to season.

Because it’s February, I feel I’ve got to take advantage of the bounty of winter citrus in the souk. Last year, some French friends of my roommate gave us a jar of homemade lemon curd, and I thought how French, to casually whip up some creme au citron to spread on your morning baguette. It turned out to be exceptionally delicious, spread on toast, mixed into coconut yogurt, eaten with a spoon out of the jar. And with a little research, I realized that it is also simple to make. I made lemon curd yesterday morning to eat with fresh cheese and bread, a perfect accompaniment to my Saturday brunch. Bon appetit.

*note: I felt I could trust Martha (Stewart), so I used her recipe. It makes quite a small amount (about a cup), so you might want to double it for a family.

Ingredients:

  • 3 egg yolks*
  • zest from 1/2 large lemon
  • 1/4 cup lemon juice
  • 6 tablespoons sugar
  • 4 tablespoons unsalted butter

1. Combine all ingredients in small saucepan and whisk to combine. Set over medium heat and stir constantly with a wooden spoon until the mixture coats the back of the spoon ( 5-6 minutes).

2. Take off the heat, continuing to stir, and whisk in the butter 1 tablespoon at a time until smooth. Scoop into a small bowl and place plastic wrap (or a clear plastic bag) over the surface to prevent a skin from forming. Leave in the refrigerator for 1 hour (or 45 minutes, if you’re as impatient as I am). Can be refrigerated for 2-3 days.

* I have found the easiest way to separate the yolk from the egg is to crack the egg  in two and pour the yolk back and forth between the halves over a bowl until the white has drizzled out. Use leftover whites for an especially healthy omelette, or an especially delicious batch of meringues.

Semolina Biscotti with Dates and Walnuts

IMG_0240

Too often, we hear “biscotti” and we think of those plastic-wrapped, rock-hard cookies sold on coffee chain counters across America. But this beloved Italian cookie is not to be overshadowed by ungainly drop cookies. Homemade biscotti are toasty and sophisticated, able to withstand dunking in coffee or tea, but tender enough to be eaten on their own.

I discovered these biscotti my first winter in Morocco, during which I drank endless glasses of hot mint tea. Needing a companion to dip in my beverage, I decided to make cookies with dates, walnuts, and semolina flour, all ingredients found in abundance in my neighborhood souk. Moroccans would never chop up dates to put in cookies, but this aberration was a revelation- slightly crisp, with pockets of chewy sweetness and crunch, they have a heartier texture from the semolina flour. Plus, they mix up in one bowl, and are easily adaptable. I can imagine adding orange zest, pistachio, chunks of dark chocolate, or drizzling glaze on top. No need for a special occasion to bake these biscotti. Your afternoon coffee will thank you.

Recipe adapted from http://www.King Arthur Flour.com (golden semolina biscotti)

Makes 15 large biscotti.

Ingredients:

  • 5 tablespoons melted butter
  • 2/3 cup sugar
  • ½ teaspoon salt
  • 2 teaspoons baking powder
  • 2 teaspoons vanilla
  • 2 large eggs
  • 1 ½ cups AP flour
  • 1/3 cup semolina flour
  • 1 cup chopped walnuts
  • 1 cup chopped dates
  1.  Grease a baking sheet. Preheat your oven to 350 degrees F.
  2. Stir together the melted butter, sugar, salt, baking powder, and vanilla until blended well. Stir in the eggs one at a time, then blend in the flour and semolina until just mixed. Stir in the chopped dates and walnuts with wooden spoon.
  3. Scoop out the dough and shape into a 10 x 4 inch log. The log will spread as it bakes, so make sure there is room on either side. Bake in preheated oven for 30-35 minutes. Cool for 1 hour.
  4. Slice the log on the diagonal into 1/2 -3/4 wide inch pieces. Place the biscotti on a clean baking sheet. Bake in a preheated 325 degree F oven for 25-30 minutes, or until golden brown. Allow to cool on the sheet.

Beet and Yogurt Dip

I love beets. I will admit, however, that my main motivation for cooking with them is that gorgeous purple-pink hue that tints everything they touch- the other food on the plate, my hands, the kitchen counter. No matter, give me a fuchsia stain any day. Cooking with beets makes me feel like an artist.

IMG_0161

This dip will take you five minutes to whip up, and is infinitely adaptable. Drizzle olive oil on it, mix some cumin in, garnish it with slices of preserved lemon. To make it more substantial, you could blend in some cooked chickpeas and tahini to make a sort of hummus. I eat it with crusty baguette, by the spoonful, or with slices of cucumber or carrot. It’s healthy, inexpensive, and so, so pretty.

Quick side note: The best way to cook beets is to scrub them clean, wrap them individually (unpeeled) in foil, and bake them in a 400 degree oven for 30-60 minutes, depending on the beet size. They will be finished when you can poke them easily with a sharp knife. Let them cool, unwrap, and peel. I picked this tip up from Mark Bittman’s “How to Cook Everything”.

Ingredients:

  • 1 small beet, cooked and peeled (see above)
  • 1 cup plain Greek yogurt
  • 1 garlic clove, grated
  • lemon juice from half a lemon
  • salt and pepper to taste
  • small handful chopped walnuts
  • parsley, to garnish

1. Blend all ingredients, except for walnuts and parsley, in blender or food processor.

2. Garnish with chopped walnuts and parsley. Serve.

Chocolate Layer Cake with Salted Caramel Frosting and Toasted Pecans

I think there is something distinctly special about a layer cake. Layer cakes can’t be whipped together in an hour, or mixed in one bowl, or toted easily to the park for an impromptu picnic. They take time and a little planning, and they are usually made for a special event- weddings, birthdays, anniversaries. Layer cakes are not cut into pieces and laid on a plate. They arrive, with precarious height, do-not-touch peaks of icing, and in this case, rivulets of salted caramel.

Two layers of moist chocolate cake made with coffee and buttermilk are encased in a salted caramel frosting  and filled with chopped toasted pecans and caramel. And of course, drizzled with more caramel and decorated with toasted pecan halves. I have to give due credit to my coworker and friend Beatrice for inspiring this one: she suggested I make a turtle cake. It’s got the slight crunch and caramel-y decadence of the candy with the lavish proportions of a cake meant for celebration.

Chocolate Cake

(courtesy of Ina Garten)

Ingredients:

  • 1 3/4 cup all-purpose flour
  • 2 cups sugar
  • 3/4 cup unsweetened cocoa powder
  • 2 teaspoons baking soda
  • 1 teaspoon baking powder
  • 1 teaspoon salt
  • 1 cup buttermilk
  • 1/2 cup vegetable oil
  • 2 large eggs
  • 1 teaspoon vanilla extract
  • 1 cup freshly brewed hot coffee
  1. Preheat the oven to 350 degrees. Butter (or use cooking spray) to grease two 8-inch round pans*. Line with parchment paper (to do this, fold sheet of parchment in half, and then in half again. Using the bottom of the pan as a guide, trace and cut the square into a quarter-circle- when you unfold, you should have a circle the size of the pan). Grease the parchment and sides of pan again.
  2. Beat together the flour, sugar, cocoa powder, baking soda, baking powder, and salt with an electric mixer at low speed. Whisk together the buttermilk, oil, eggs, and vanilla in a medium bowl. Slowly beat the wet mixture into the dry ingredients until just incorporated, and then slowly beat in the hot coffee until fully incorporated.
  3. Pour the batter into the prepared pans and bake for 35 minutes, or until a toothpick inserted into the center comes out clean. Let the cakes cool in the pans for 30 minutes, and then- very carefully- invert the cakes onto a rack to cool and peel off the parchment (if you want to be extra careful, run a knife around the edge of the pans before inverting). Keep oven on if you plan on toasting the pecans.
* you may choose to use one or both of the layers; I used one.
Salted Caramel Frosting + Pecan topping
(frosting courtesy of bakedbree.com)
Ingredients:
  • 2 sticks room temperature butter
  • 1 brick (8 oz) room temperature cream cheese
  • 1/2 cup salted caramel + 3 tablespoons (I bought a jar at Trader Joe’s- you could also make your own)
  • 4 cups powdered sugar
  • 2 tablespoons milk
  • 1/2 cup pecan halves 
  1. Turn oven down to 250 degrees. Spread pecans evenly over a baking sheet lined with foil. When oven is heated, toast pecans for 5-8 minutes, turning once or twice during baking. Be careful- these will burn easily. When pecans are finished, remove from the oven, allow to cool, and set aside 8 pecan halves. Chop the remainder into fine pieces.
  2. In the meanwhile, cream together butter and cream cheese with an electric mixer.
  3. Pour in the salted caramel and beat until combined.
  4. Gradually add the powdered sugar. Add milk as needed, as I found the frosting to be very stiff. Beat for a few minutes- the more air, the better!
Assembly
  1. Set aside one cake layer to freeze or use later (or alternatively you could use both cake layers to make an extra tall cake- I prefer mine on the more petite side- in any case, you will have enough frosting for both layers).
  2. Place the other layer on a cake round or plate, so that the flat bottom of the cake is facing up. Using a serrated knife, slice the layer in half (insert the knife in about 1 inch; using your hand to turn the cake, saw around the edge of the cake several times, inserting knife in further an inch at a time). Remove the top layer carefully and set aside.
  3. Using a small offset spatula, or small rubber spatula, dollop a generous amount of frosting on the top and spread the frosting outward in small circular motions. Continue adding more frosting until layer is covered. Using a spoon, drizzle 2 tablespoons of salted caramel (or more if you wish!) evenly over the frosting. Sprinkle chopped pecans evenly over the top. Place second layer over the top.
  4. Now for the “crumb coating”. Use a small spatula to spread frosting in a very thin layer over entire cake. This layer should catch any crumbs that would mar the final coating of frosting. Wait 20 minutes to 1 hour before spreading on the remainder of the frosting over the sides and top of the cake (if you only used 1 layer like I did, you should have plenty of leftover frosting. Sandwich cookies anyone?)
  5. Place 8 toasted pecans halves evenly around the perimeter of the cake. Using a fork and a little bit of caramel at a time, very carefully and slowly drizzle caramel across the top of the cake.